Deploy an app to the edge in under 10 minutes
What you will accomplish
By the end of this guide, you will be able to deploy an edge application to any edge node on Edgeworx Cloud and use this knowledge to expedite software development and deployment for and at the edge at scale.
Software Requirements
- Edgeworx Cloud account (Free or paid)
- Docker Desktop and a Docker account (only if you package your own Docker images)
Hardware Requirements
- An edge device with Linux (Debian is preffered)
- Power supply : 5.1V * 3.5A
- Micro SD card with at least 16GB capacity (32GB+ recommended)
- Internet connectivity
Packaging your app
If you plan to package your own application, you can refer to Docker’s official guide on packaging applications . That guide will give you step by step instructions on how to build, package, and release an application to Docker. You’ll be able to pull your custom image from Docker after following those steps.
Deploying your app
Add your devices to Edgeworx Cloud
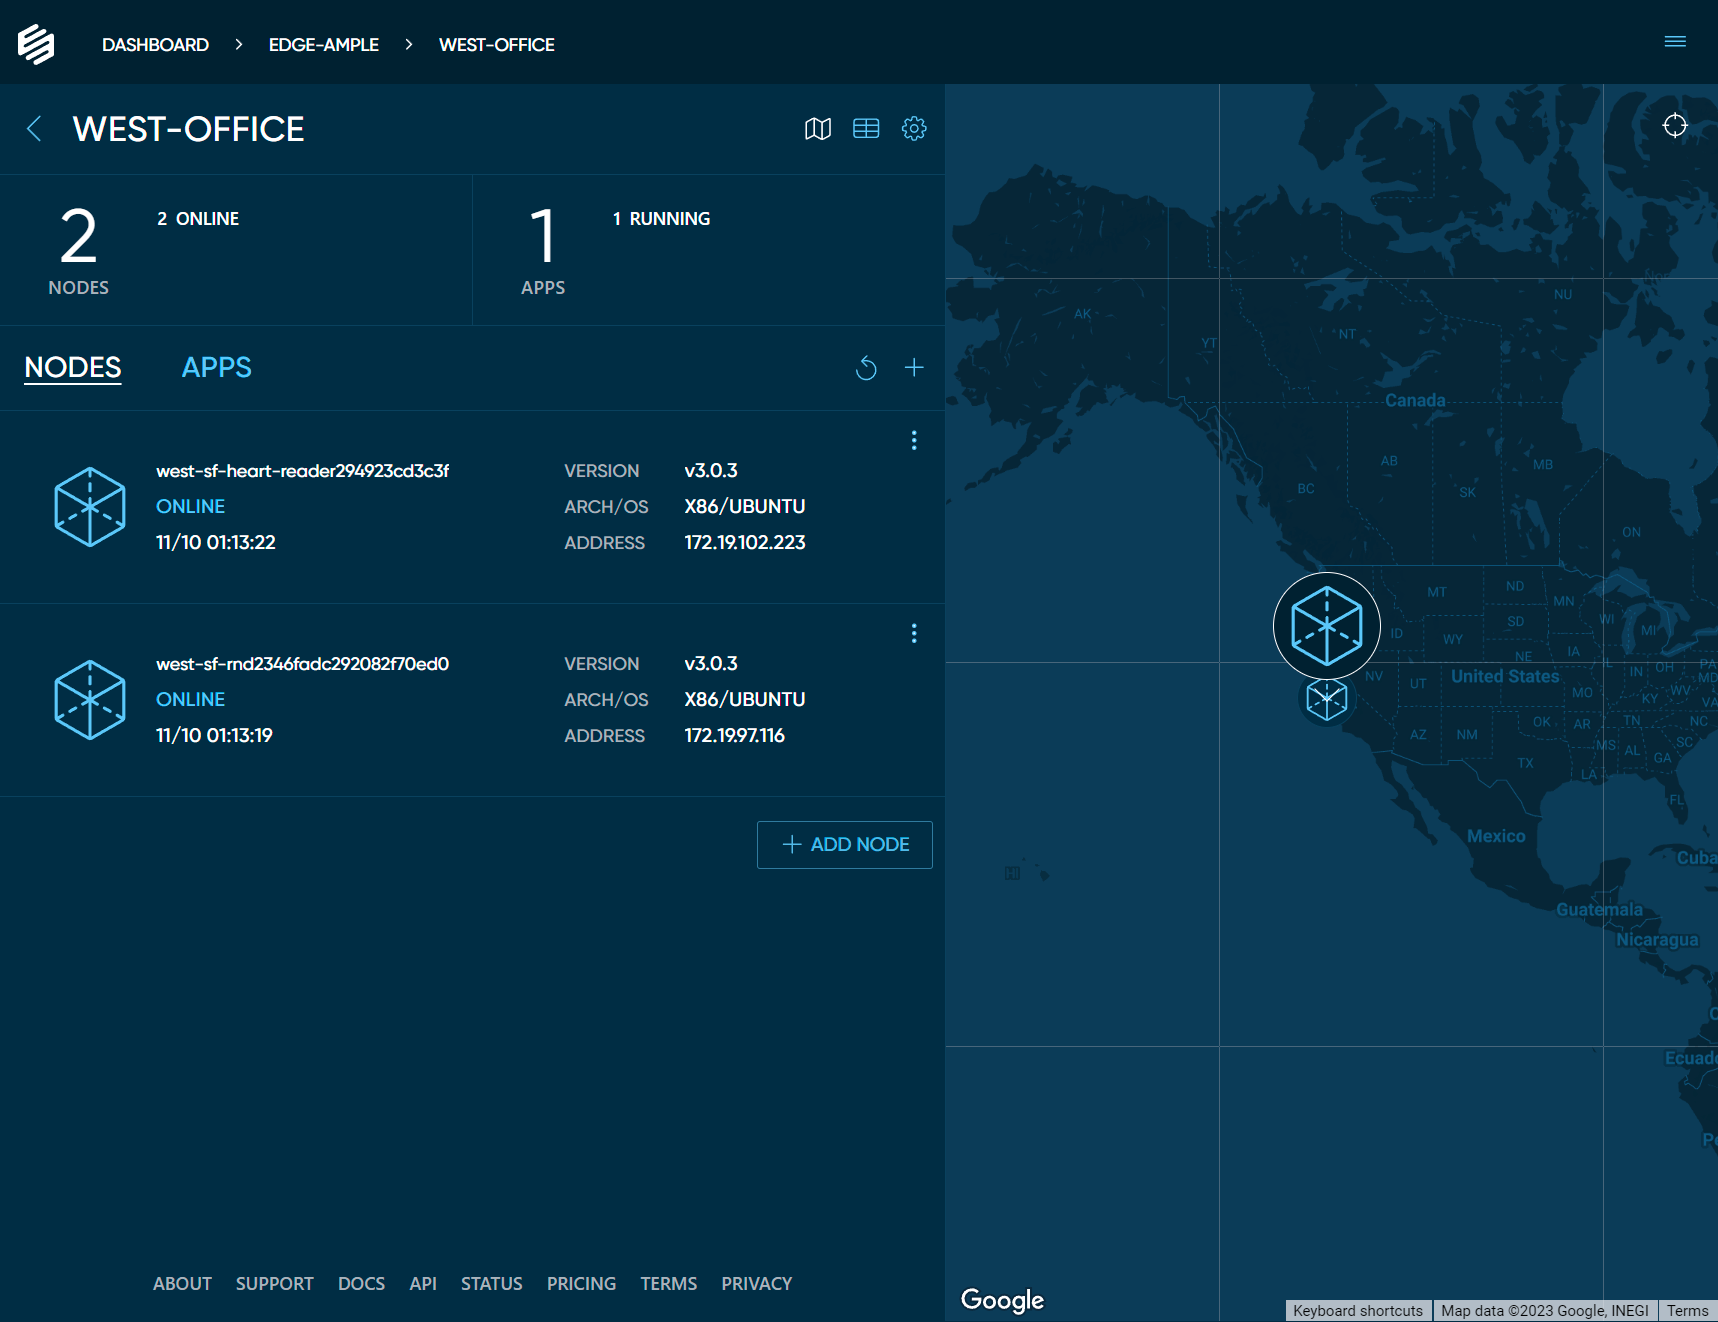
Edgeworx Cloud gives you management of all your edge devices and edge applications in one place. You can open a SSH shell session on demand, deploy applications, and see the health and status for every device. All of this functionality works no matter where your edge devices are physically located, even when they are behind NAT layers and firewalls.
If you don’t already have an account, you can create one now for free or log in at https://cloud.edgeworx.io .
Once you are in your Edgeworx Cloud account, choose your Sandbox or a
project
nested in an Org, and
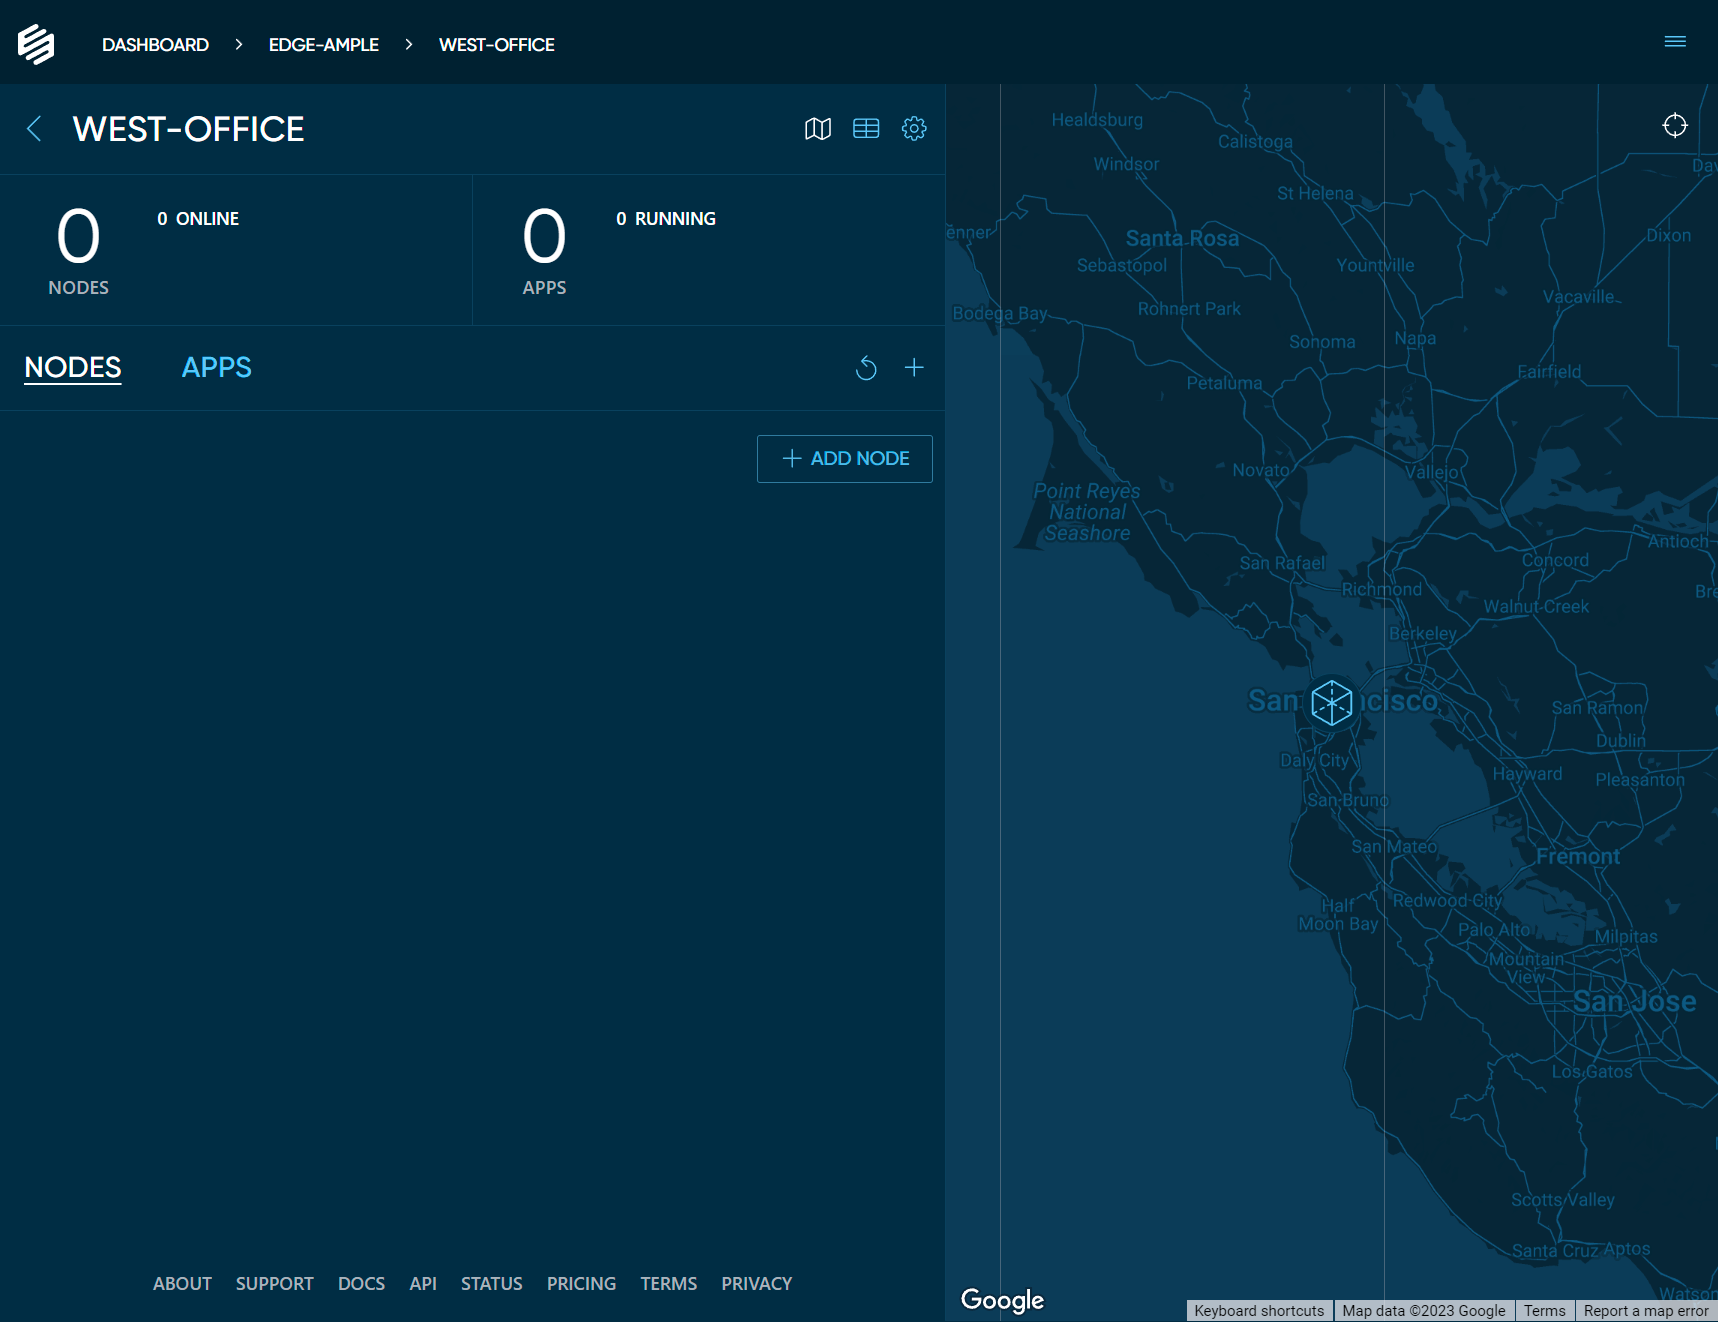
add your device as a node
using the + ADD NODE button. Follow the instructions in the pop-up window to
continue with either a virtual node or physical device.
Create your application YAML
Here is a sample YAML file to work with. Since we will be deploying the “hello-world” Docker container , we just need to create the YAML file, and upload that as the configuration.
kind: Application
apiVersion: iofog.org/v3
metadata:
  name: your-application-name
spec:
  microservices:
    - name: your-microservice-name
      agent:
        name: your-edgeworx-cloud-node-name
      images:
        arm: "library/hello-world"
        x86: "library/hello-world"
      container:
        rootHostAccess: true
        ports:
          - external: 5005
            internal: 80
            proxy: true
            scheme: http
        volumes:
          - containerDestination: /dev
            hostDestination: /dev
            type: bind
            accessMode: rw
Your application deployment YAML file contains the information that Edgeworx Cloud uses to load and
run your Edgeworx application on any device. Replace the placeholder fields with your own
information and save the file with whatever file name you like, such as my-app-deploy.yaml.
For the agent name, which is shown above as your-edgeworx-cloud-node-name you should use the actual
node name from your Edgeworx Cloud account. This is the name that shows for your device which you added
in the steps above.
Deploy your Edgeworx application
Now that you have all of the pieces, it’s easy to deploy your application to your device. In the project where the target device is located, open the APPS tab and click + DEPLOY APP and follow the instructions in the pop up.
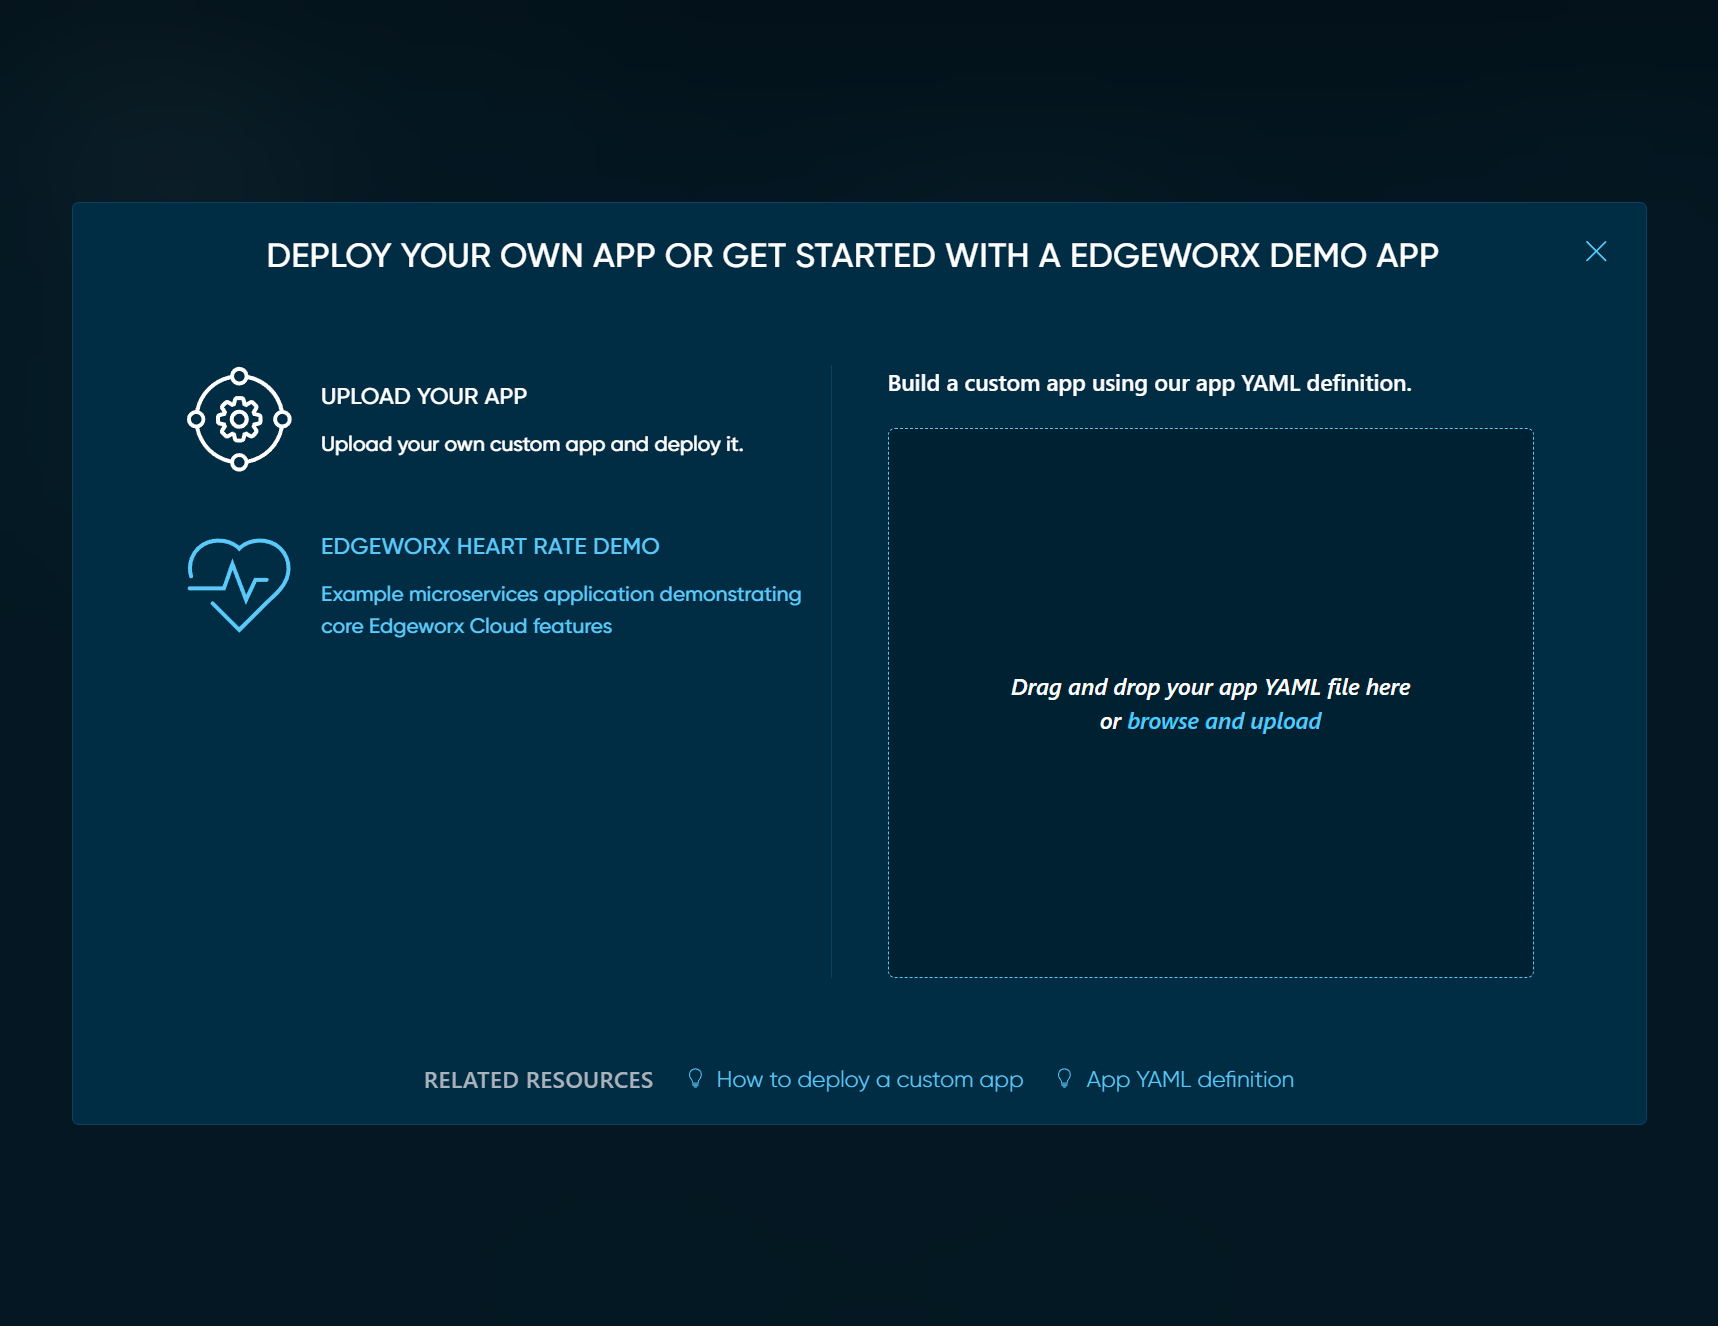
In the pop-up window, choose the UPLOAD YOUR APP option and you can drag and drop your YAML file into that window or upload it.
Edgeworx Cloud will notify you if there are issues with the YAML file or your app deployment. Once deployed, you can monitor the image or images being pulled and their status once it is running.
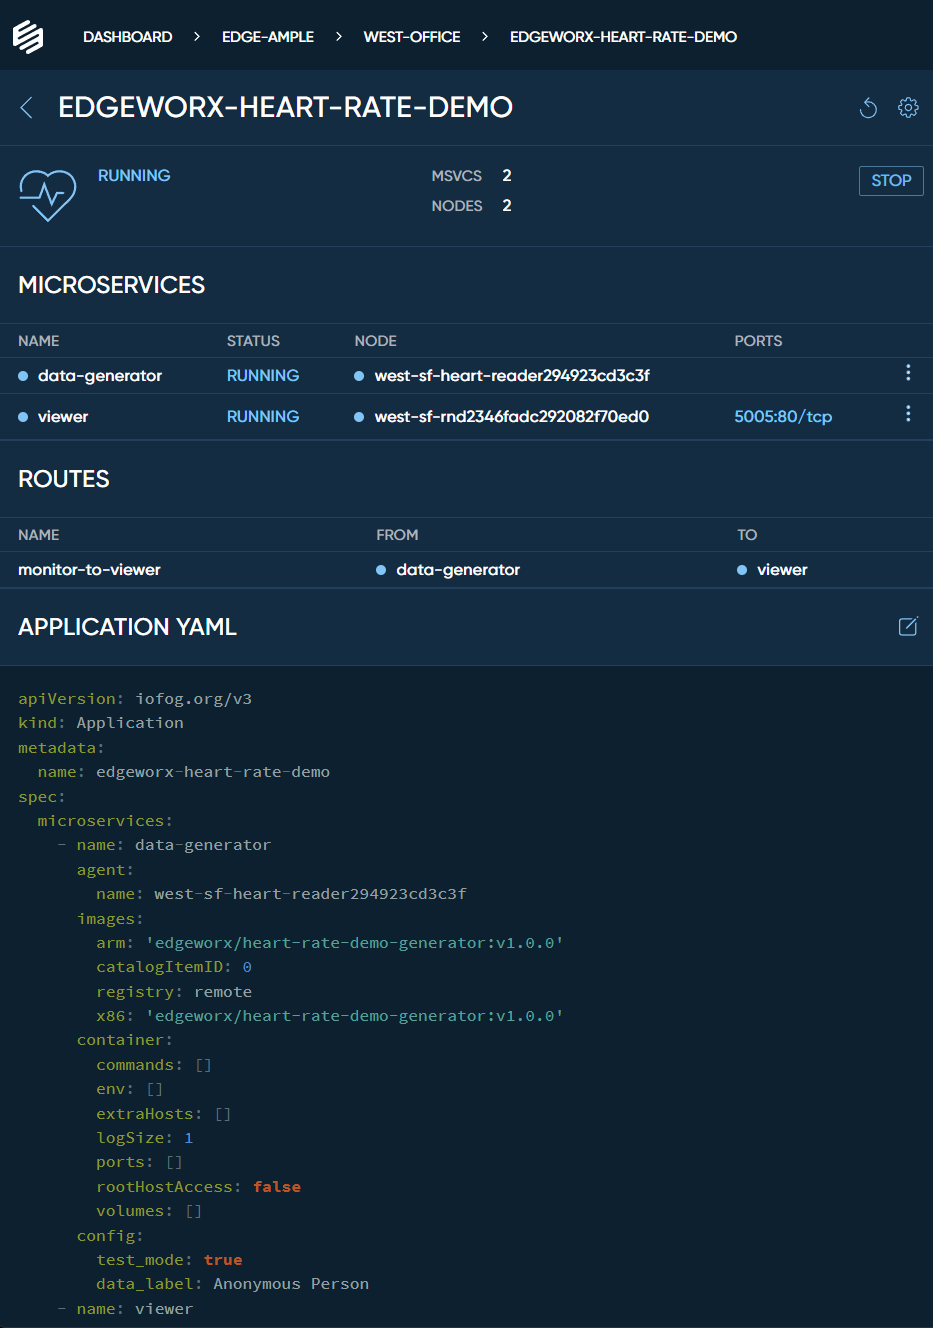
Use your application
When your application has successfully been deployed to your devices, you will see the
status RUNNING in your Edgeworx Cloud UI.
You have accomplished a great amount at this point. Congratulations! You have developed an edge application to an edge node using Edgeworx Cloud. This image can now be deployed to any other device you have made into a node on your account.
Next steps
With this foundational knowledge you can now deploy applications with confidence.